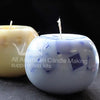
Melting the wax and wicking the candle
February 02, 2018
Make the very best candles using these basics. Check the temperature that your mould will tolerate; choose your wax, colour and fragrance and you are ready to start...
All waxes are melted this same way as the water protects it from over-heating.
Using a double saucepan is not only the CLASSIC way to melt candle wax, but the safest method.
Begin collecting all sorts of tins and old pots that can be your wax pots.
Of course for starters small tins are great, they only take 10 minutes to melt and you can make your first candle.
You can even purchase pouring pots at grocery stores that have a capacity of about 500gm, with a lip and a handle.
These can sit in the water, make a very convenient wax pot for small quantities.
These tins of wax sit in larger saucepans or soup pots filled with water.
Basic Wicking
- Melt your wax mixture as in the previous project.
- Prepare the mould – feed the wick through the hole at the top of the mould, then push the skewer through the wick at the other end. As the bamboo lies across the base of the mould, tighten and secure the wick at the top with a blob of re-useable adhesive (‘Blue-Tack’ or other). Trim the wick to about 2cm.
- Sit the mould in the box and level it
- Fill the ladle/tea pot with wax and pour into the mould
- As the top forms over, break it with a skewer, and refill as the level drops.
- Paraffin wax contracts a great deal as it cools, so break the surface and refill regularly through the day as required.
- Generally the candle will need to be left overnight to cool sufficiently, then have a final refill; trim off the skewer and flatten the base on a warm surface.
- NB: For palm wax, any wick peeping out from the blue-tack should also be covered.
