Your Cart is Empty
TAKE ADVANTAGE OF OUR WHOLESALE PRICES & VISIT OUR SHOWROOM. OPEN 9AM-4PM MONDAY-FRIDAY
TAKE ADVANTAGE OF OUR WHOLESALE PRICES & VISIT OUR SHOWROOM. OPEN 9AM-4PM MONDAY-FRIDAY

Classic candles in many heights and diameters. Choosing your wax, mould and fragrance sets you apart form everyone else. In this worksheet we have used a metal mould- the same process can be applied to other styles of moulds.
Here we have basic instructions as listed on our instruction sheets:
STEP 1
Collect:
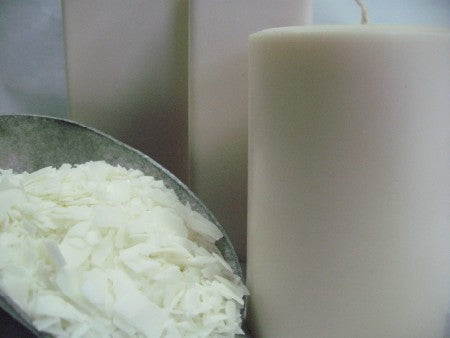
Your choice of Pillar wax
40-50ml candle fragrance - 40-50ml per kilogram, to suit the colour and style you choose
Equipment - Double Boiler is the most ideal melting method. It's when your wax is melting in a pot, that sits in a pool of hot water. This way the heat from the water melts your wax. Your wax therefore stays at temperatures below 100 Degrees C. It's gentle on the wax and also avoids hot spots that can leading to oil fires. See our Melter choices in our equipment section. We offer melters that use a "water jacket" and also Jugs that are perfect for sitting in medium sized pots, (or rice cookers filled with water). Images below.
blue tack - Generally no necessary when using silicon moulds.
STEP 2
Set up your double saucepan, adding the wax to the inner pot. Then add your candle fragrance - 40-50ml per kilogram.
Once it's melted, allow it to heat up for about 5 minutes. If you have a thermometer, allow wax to heat to 85C.
Using candle colour, check the colour if you have added any, add more if it's too pale. When adding colour, it will always look darker as a melted wax than when it sets. You can check your colour by pouring a small amount of coloured, melted wax into a cup of water. As the wax rapidly cools in water, you'll get an understanding of how your coloured candle may look.

STEP 3
During the melt process, prepare the moulds. Be sure the wick is tight and secured at each end. The hole, which will become the top, should be covered well with blue tack. Secure at the top (which will become the base of the candle) with the wick bar.


STEP 4
Pour the wax to the desired level - most moulds fill to the top - make sure you have it level at this stage, it will be easy to see if it is not.
STEP 5
As the wax hardens, you may notice that it will contract and create a hollow in the centre of the candle. It's best to go back shortly and pour again with remaining wax- this time at a lower temperature so that less contraction takes place and the void is filled.
Alternatively a "skin" may form as it sets and contraction wont be noticeable. In this case as the top forms over, break it with a skewer and refill as necessary. I like to keep these hole open, by not filling them completely each time.
Clip the excess wick off and then complete the pour with a new flat surface (base of candle).

STEP 6
Once the candle has been removed, trim the wick at the top to 5mm before lighting.
STEP 7
Enjoy!